What should be included in the Simulation Event part of the SCE Scheduling
The Simulation Event part covers the timing of the whole simulation event.
IMPORTANT: In this part, only minutes can be specified, and any given timing is to be understood relative to the exact start of the event.
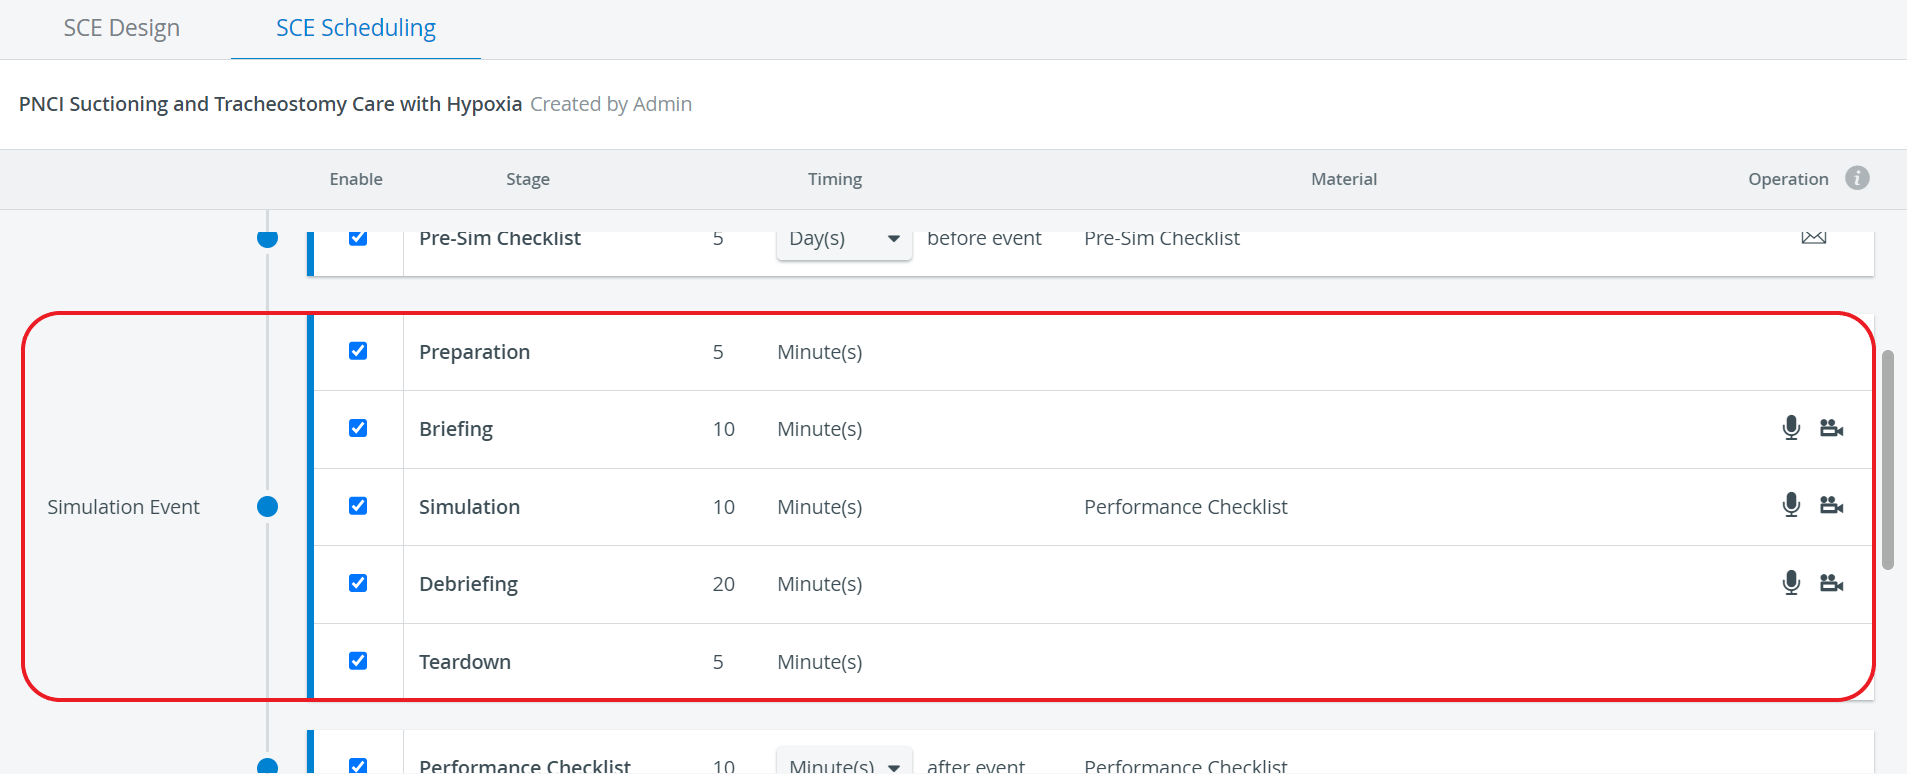
Preparation
The time interval allotted for the Operations Specialist to complete the physical preparation of the simulation environment.
NOTE: It has to be assured that sufficient time is provided for all steps specified on the Preparation tab of the Physical Arrangement part.
Briefing
The time provided for the briefing about the simulation experience: the Facilitator communicating the handoff, the patient history, and orders - if any.
Simulation
The time allowed for the learners to complete the simulation action, that is, the encounter between the learners and the SP or manikin.
Also, suppose the Simulation Checklist part is prepared. In that case, the assigned faculty will have access to fill out the questionnaire in the SRV (Single Room View) of the Recording module - for the whole event duration.
Debriefing
The time allotted for the conclusion of the simulation experience is a discussion guided by the facilitator, including learners' feedback about their peers and reflection on their own performance, guided reflection, and talking over questions to transfer learning to future medical situations.
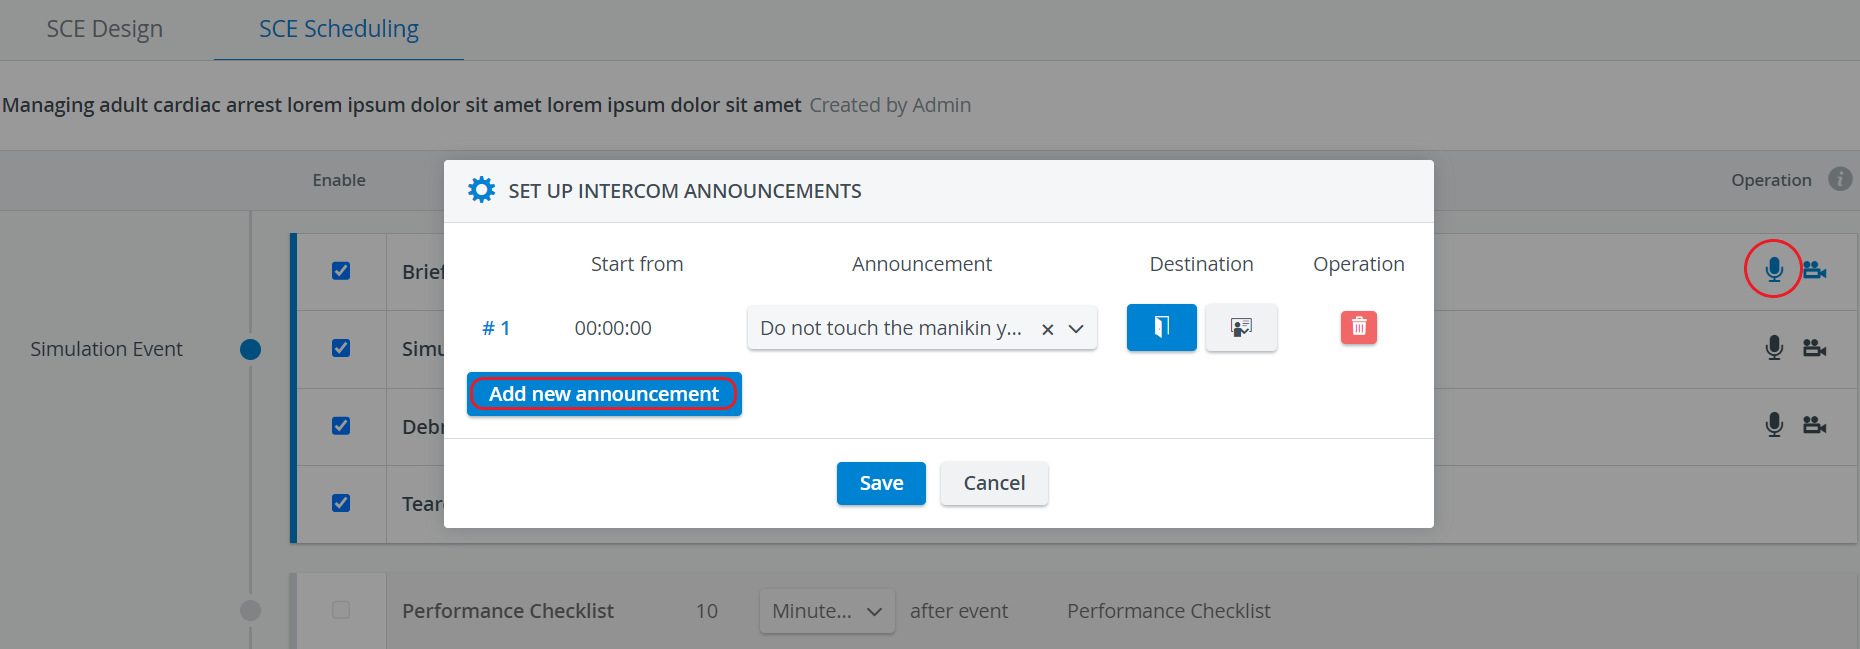
IMPORTANT: Automatic recording can be activated for the Briefing, Simulation, and Debriefing stages by clicking the camera icon under the Operation header in the corresponding row. Also, automatic announcements can be set up for the corresponding stage by clicking the intercom icon.
Teardown
The time interval designated for the Operations Specialist to carry out the teardown of the simulation environment.
NOTE: It has to be assured that sufficient time is provided for all steps specified on the Teardown tab of the Physical Arrangement part.
Automatic recording and Intercom announcements
![]() Automatic recording can be enabled by activating the camera icon for the Simulation Event’s different stages. Once activated, the camera icon turns blue.
Automatic recording can be enabled by activating the camera icon for the Simulation Event’s different stages. Once activated, the camera icon turns blue.
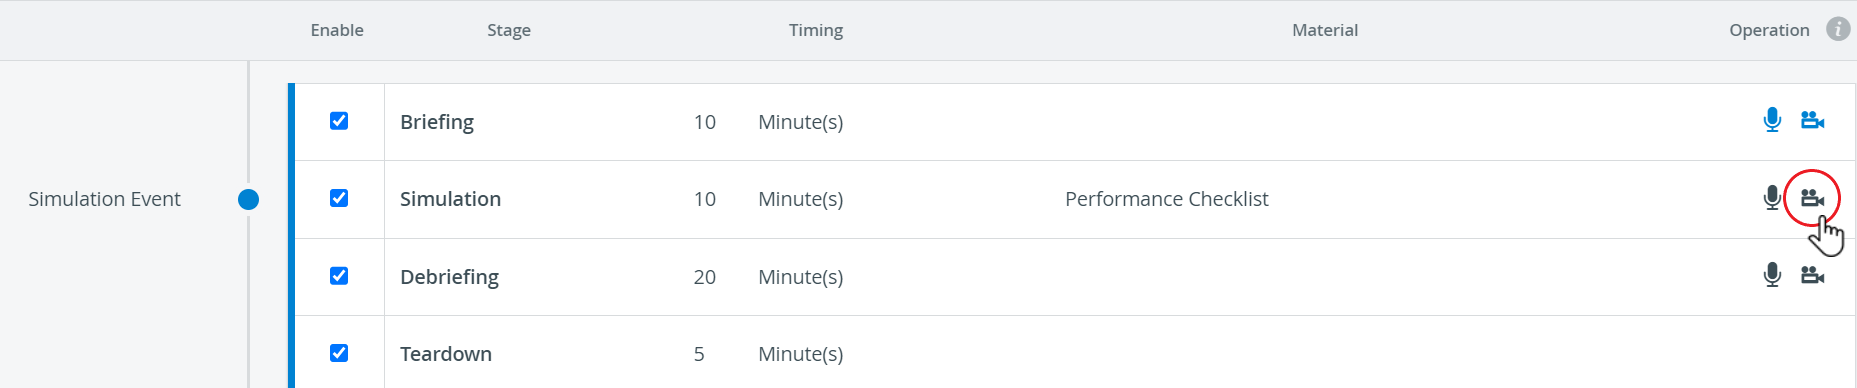
![]() Automatic sending of Intercom announcements can be added and enabled by using the microphone icon. Once activated, the microphone icon turns blue.
Automatic sending of Intercom announcements can be added and enabled by using the microphone icon. Once activated, the microphone icon turns blue.
If two stages that do not follow each other directly are set to be recorded, and the disabled or ‘0 Minutes’ (zero duration) stage in between will not be recorded, the two recordings will be connected.

When setting the duration of a stage to zero (‘0 Minute(s)’), the system warns that recording will not be started and announcements will not be sent for that stage - even if any of those options are enabled.
