SCE Scheduling
The SCE Scheduling is the extensive schedule of a simulated clinical experience, including all possible stages, their duration, and available material to be included:
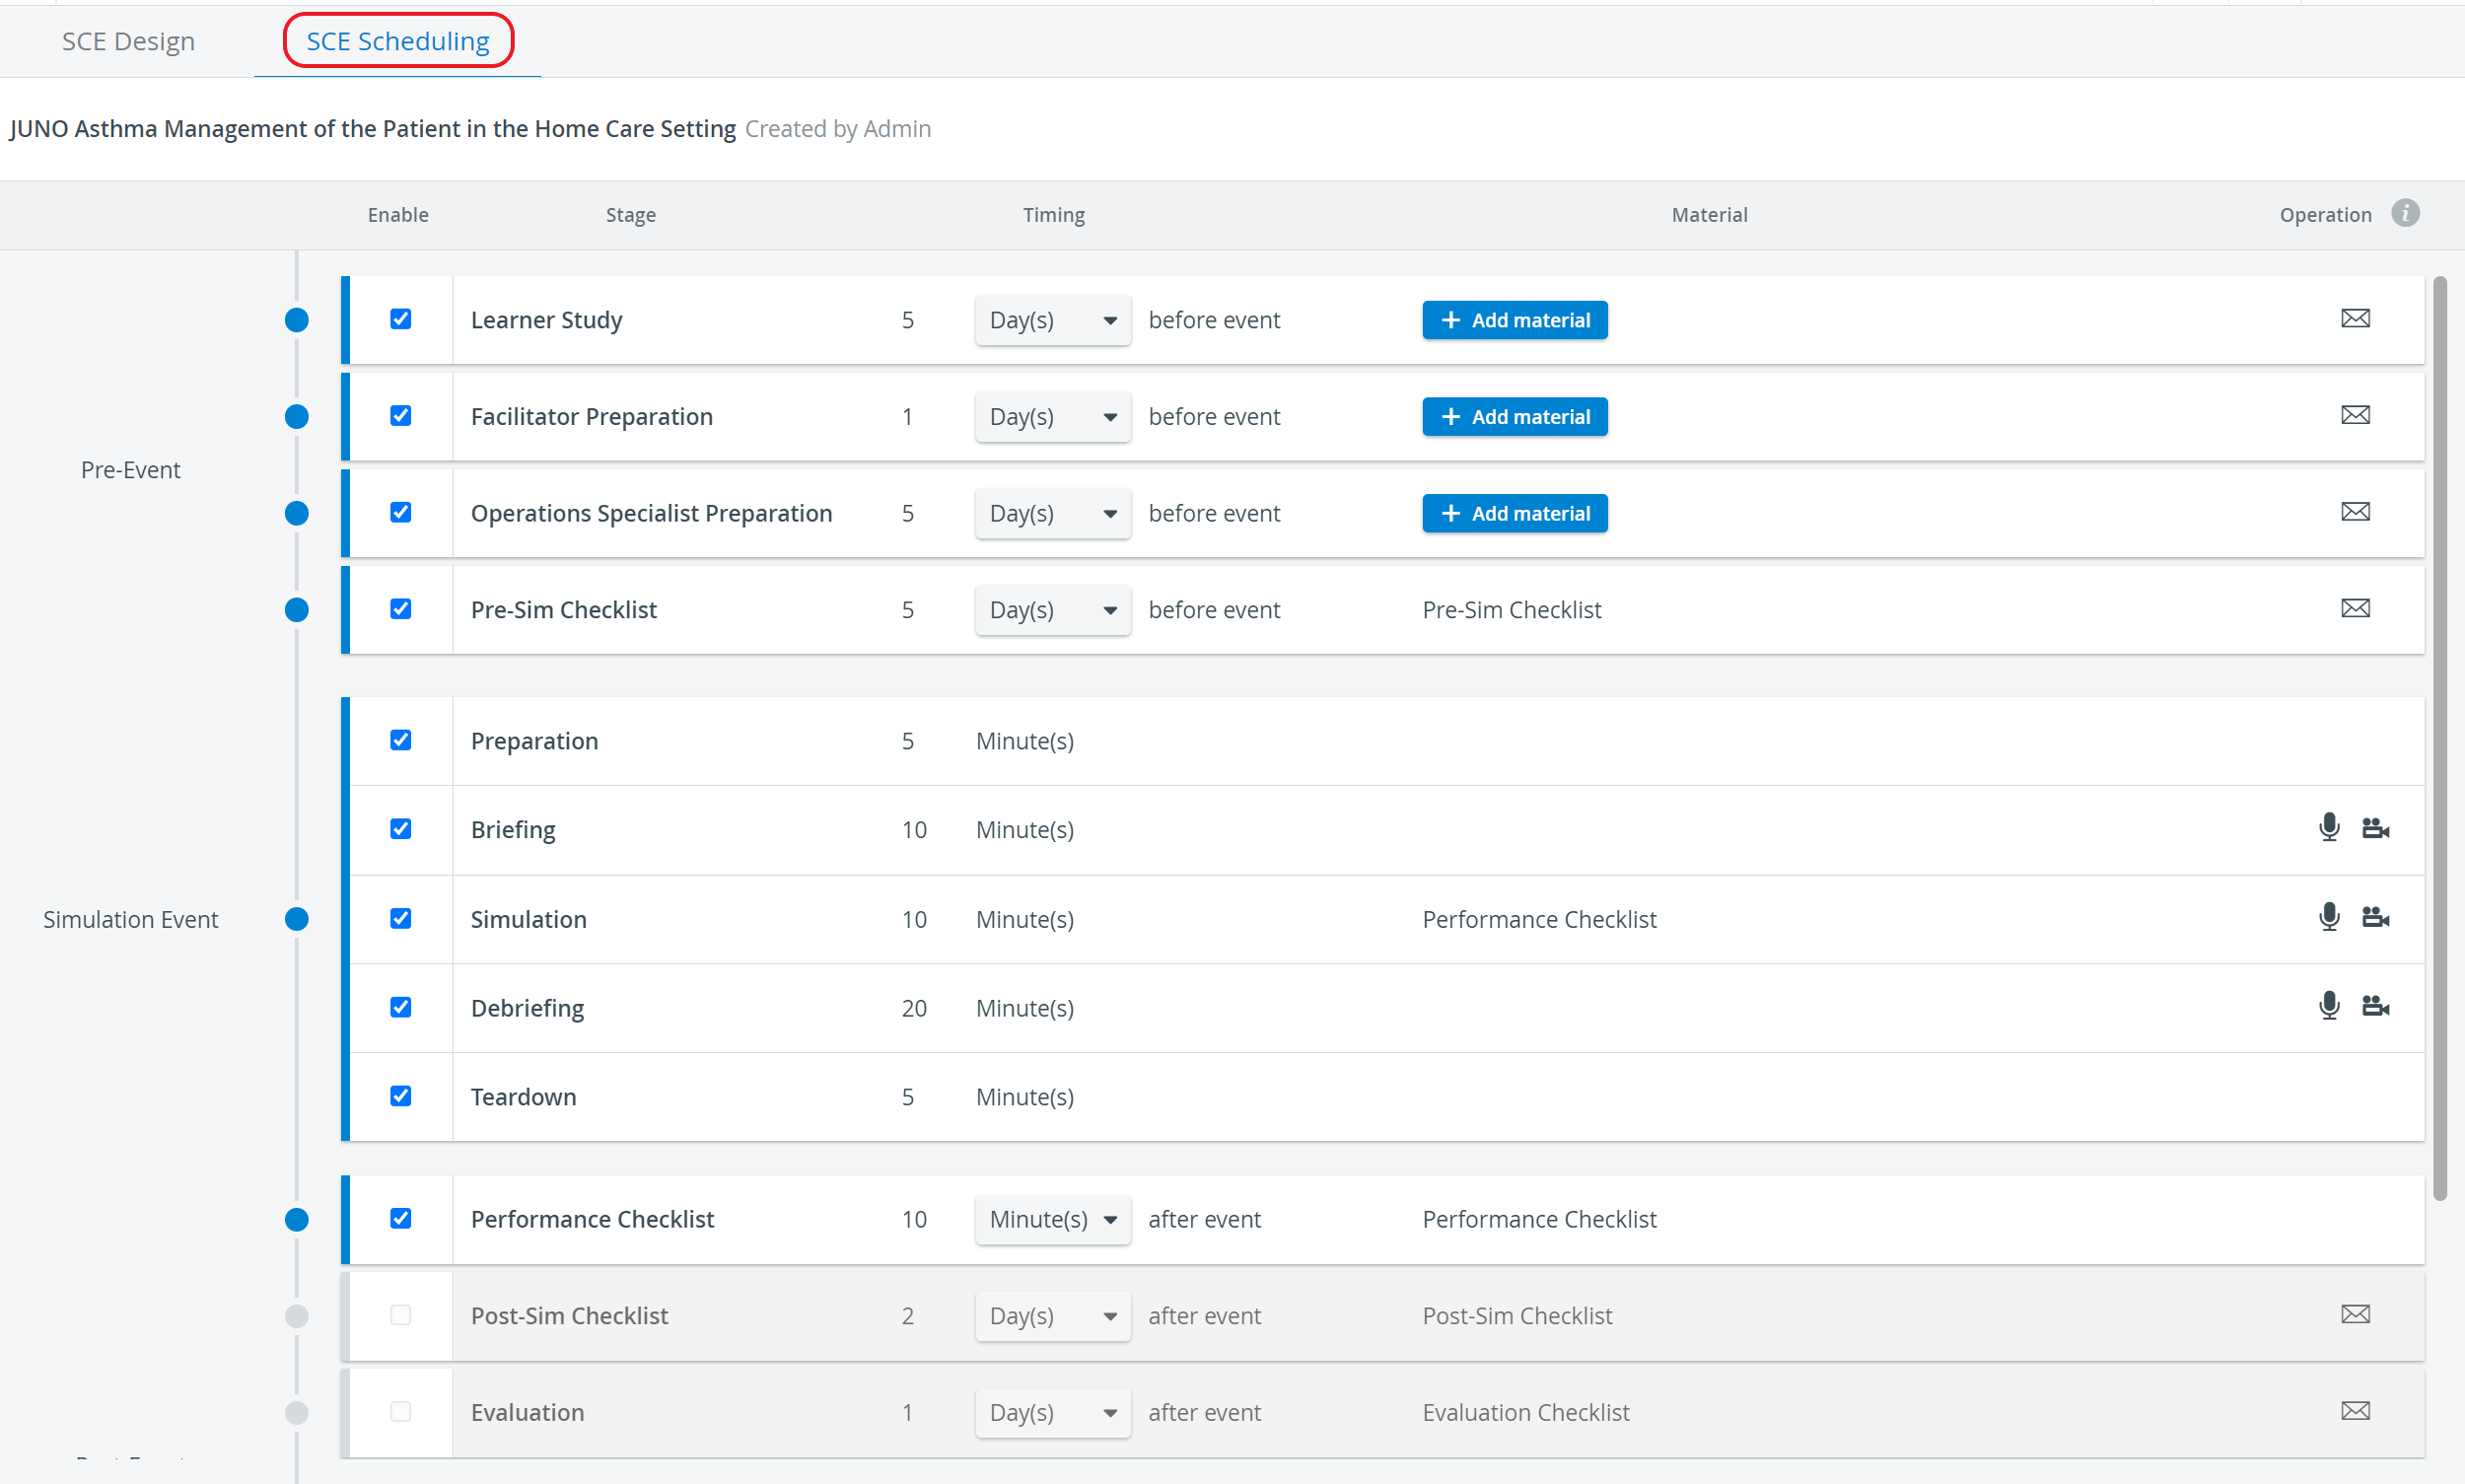
Pre-Event
The timing of the preparatory work preceding the actual simulation itself. This phase is divided according to the different participating groups and accommodates the completion of the Pre-Sim Checklist.
For an exact description, click here.
Simulation Event
The timing of the whole simulation event, including the Physical Arrangements (Preparation and Teardown) carried out by a simulation technician, Briefing and Debriefing conducted by a Facilitator, and the simulation itself presented by the learner(s) and observed (evaluated) by Faculty.
For an exact description, click here.
Post-Event
The timing of the
conclusion of the simulated experience,
potentially including learners completing an exam,
filling out an evaluation checklist
learners receiving their reports
learners' access to reviewing their video recordings
allowing for faculty to submit feedback/ evaluation about the participating learners.
For an exact description, click here.
NOTE: The SCE Scheduling should include all potentially applicable stages and material, everything that may be relevant to the SCE, as this part provides all available data when scheduling an event in the Calendar.
![]() Any email sent out must be activated by clicking the envelope icon and entering a title in the Subject field.
Any email sent out must be activated by clicking the envelope icon and entering a title in the Subject field.
It is recommended that the email template (set up on the Email tab of the System module) be checked and modified if necessary.
 Once the email is ready to be sent out, the envelope icon is displayed in a blue outline.
The sending out will have to be activated using the Enable automatic e-mail sending toggle when scheduling an event in the Calendar module (on the SCE Schedule tab of the Edit Event pop-up window).

⚠️ Modifications on an SCE - including modifying the text of the included Emails - do not affect previously created Events. This means that modifications only come into force once the Event has been updated with the modified SCE, meaning that the SCE has been re-added to the Event.
Automatic recording and Intercom announcements
![]() Automatic recording can be enabled by activating the camera icon for the Simulation Event’s different stages. Once activated, the camera icon turns blue.
Automatic recording can be enabled by activating the camera icon for the Simulation Event’s different stages. Once activated, the camera icon turns blue.

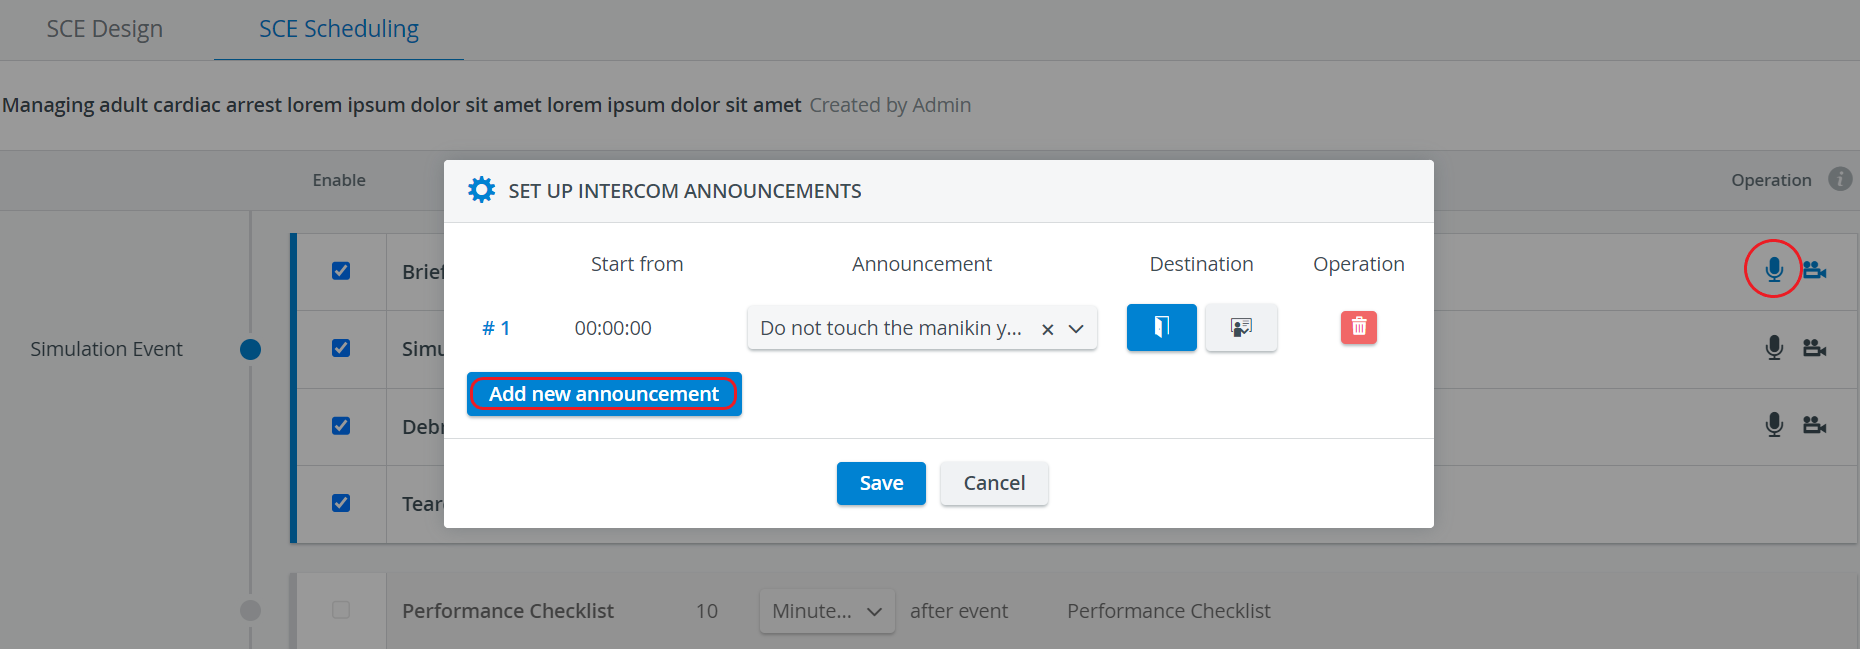
 Automatic sending of Intercom announcements can be added and enabled by using the microphone icon. Once activated, the microphone icon turns blue.
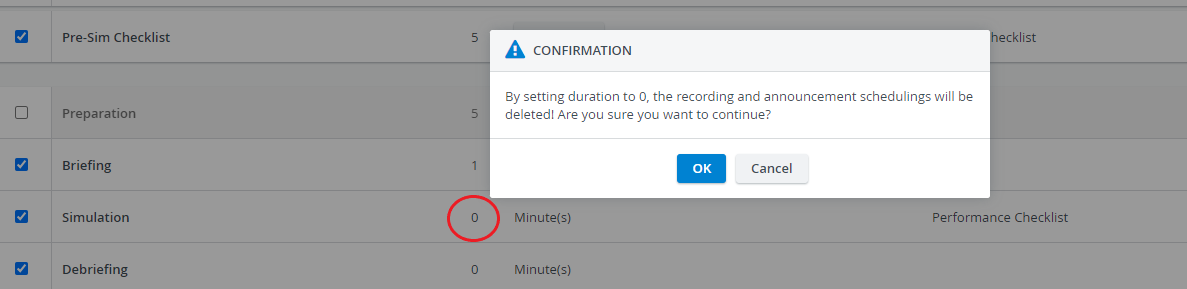
If two stages that do not follow each other directly are set to be recorded, and the disabled or ‘0 Minutes’ (zero duration) stage in between will not be recorded, the two recordings will be connected.

When setting the duration to zero (‘0 Minute(s)’), the system warns that recording will not be started and announcements will not be sent for that stage - even if any of those options are enabled.
For further information, visit our SCE Management and SCE Management - FAQ pages.