Managing Simulated Clinical Experiences (SCE)
Preliminary Setup
No preliminary setup is needed.
Process Flow
NOTE: The different data of the SCE are optional to fill out, therefore creating an SCE may differ significantly. The following step-by-step guide includes the most essential fields normally required for a simulation.
For specific settings, see the SCE Management - FAQ section.
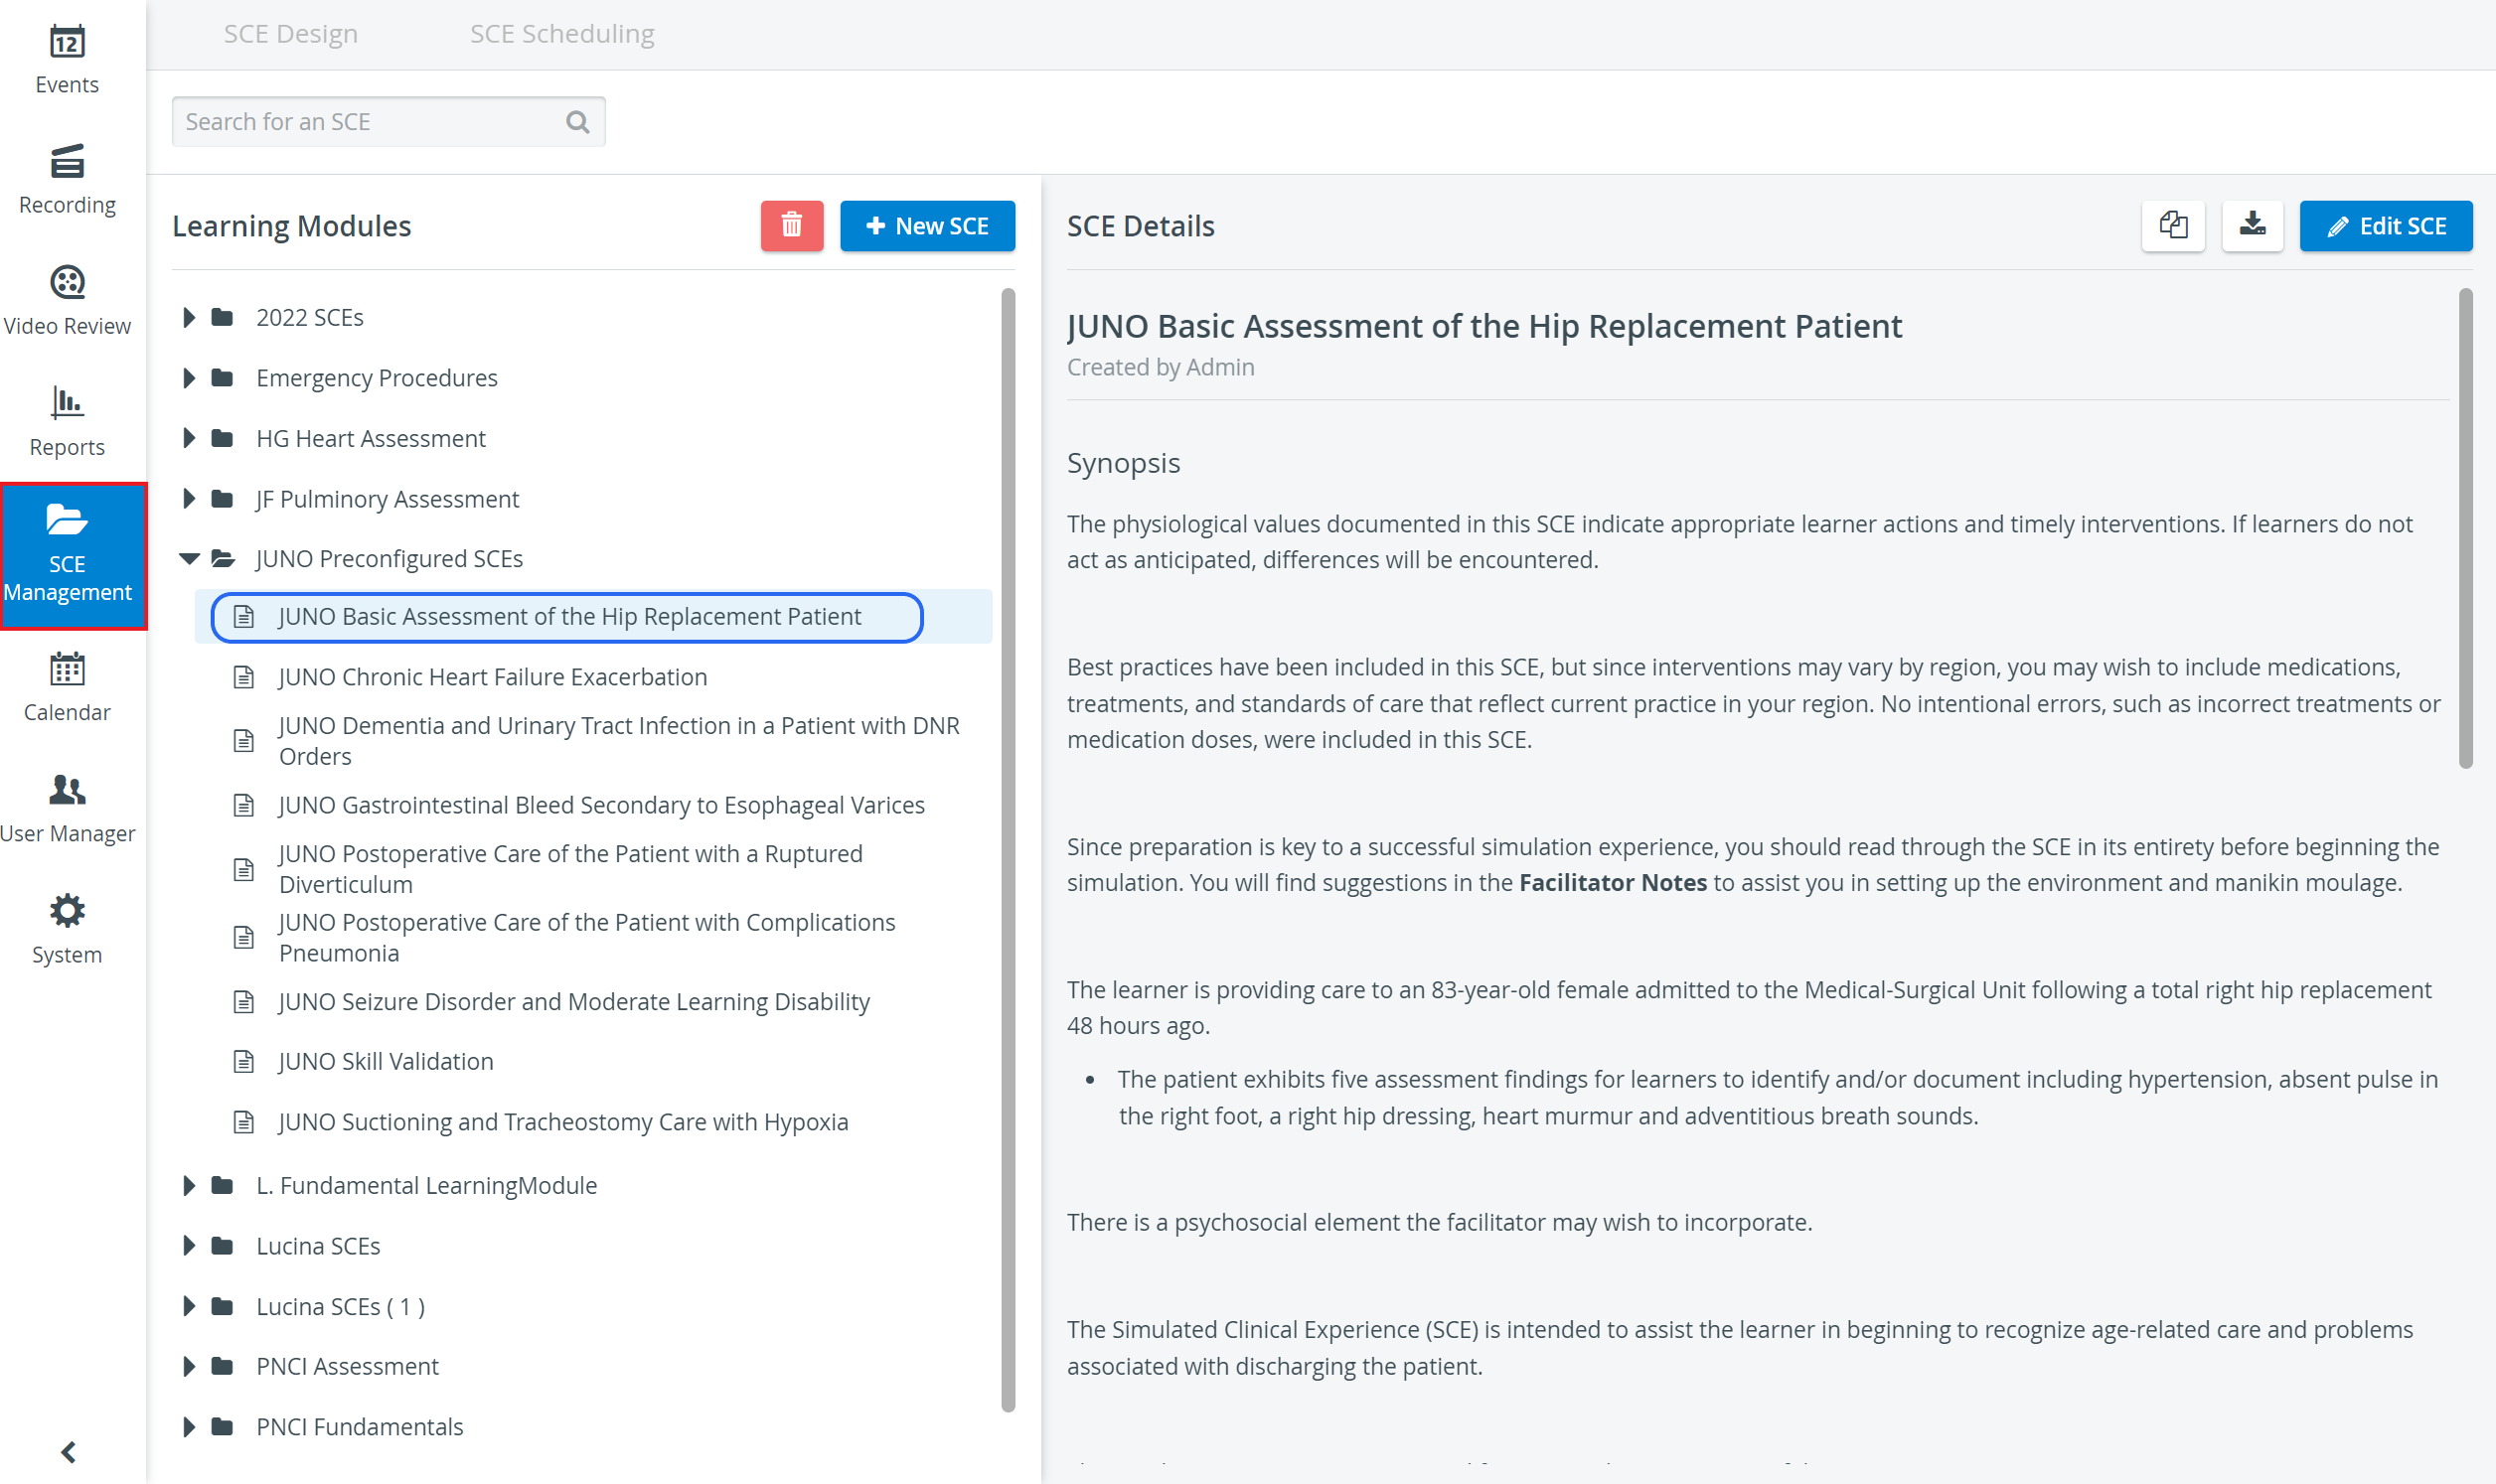
On the SCE Management tab, create a new SCE by clicking the New SCE button in the top right corner of the Learning Modules panel. SCE title is necessary to distinguish the newly added scenario.
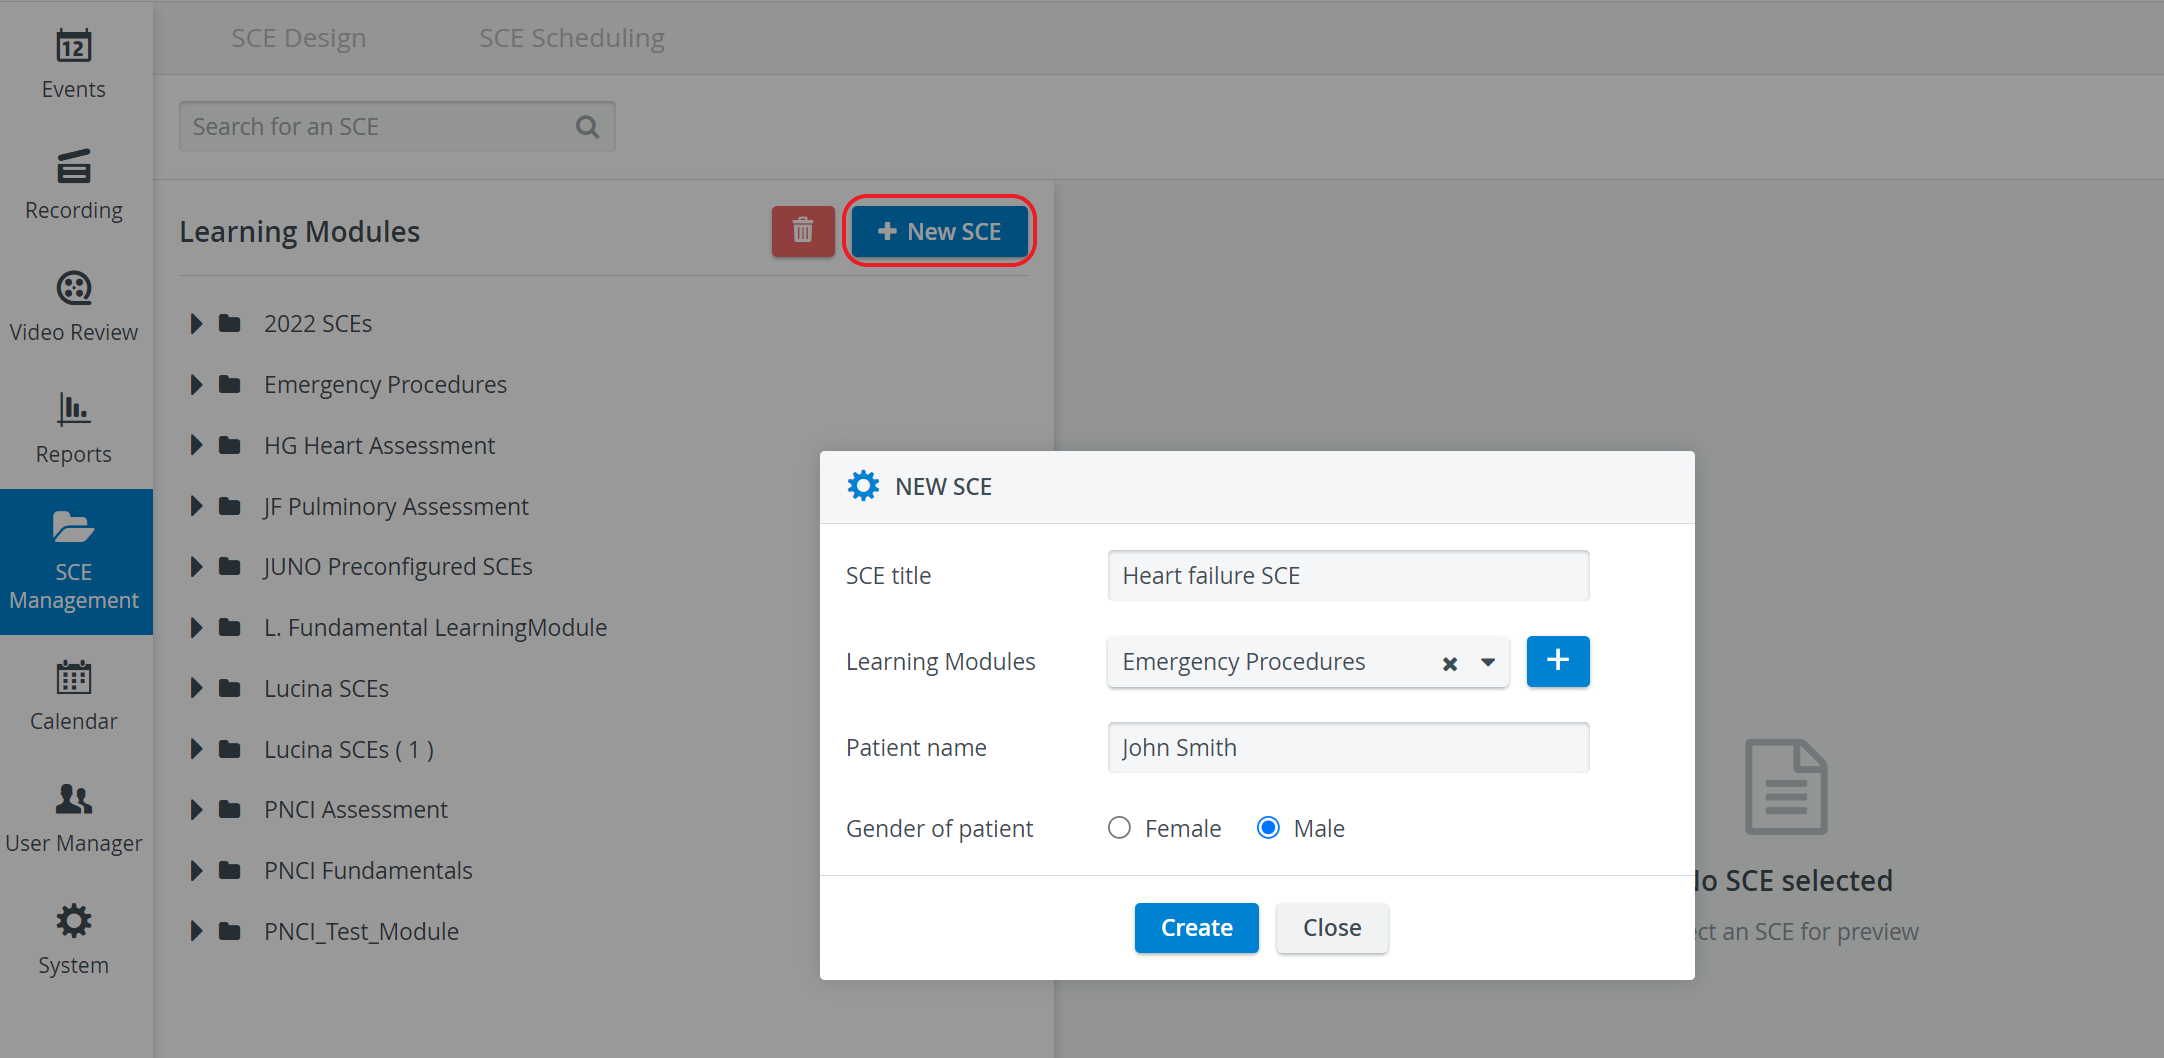
Use the Learning module drop-down to categorize your SCEs. Click the plus button in the New SCE pop-up window to add a new learning module.
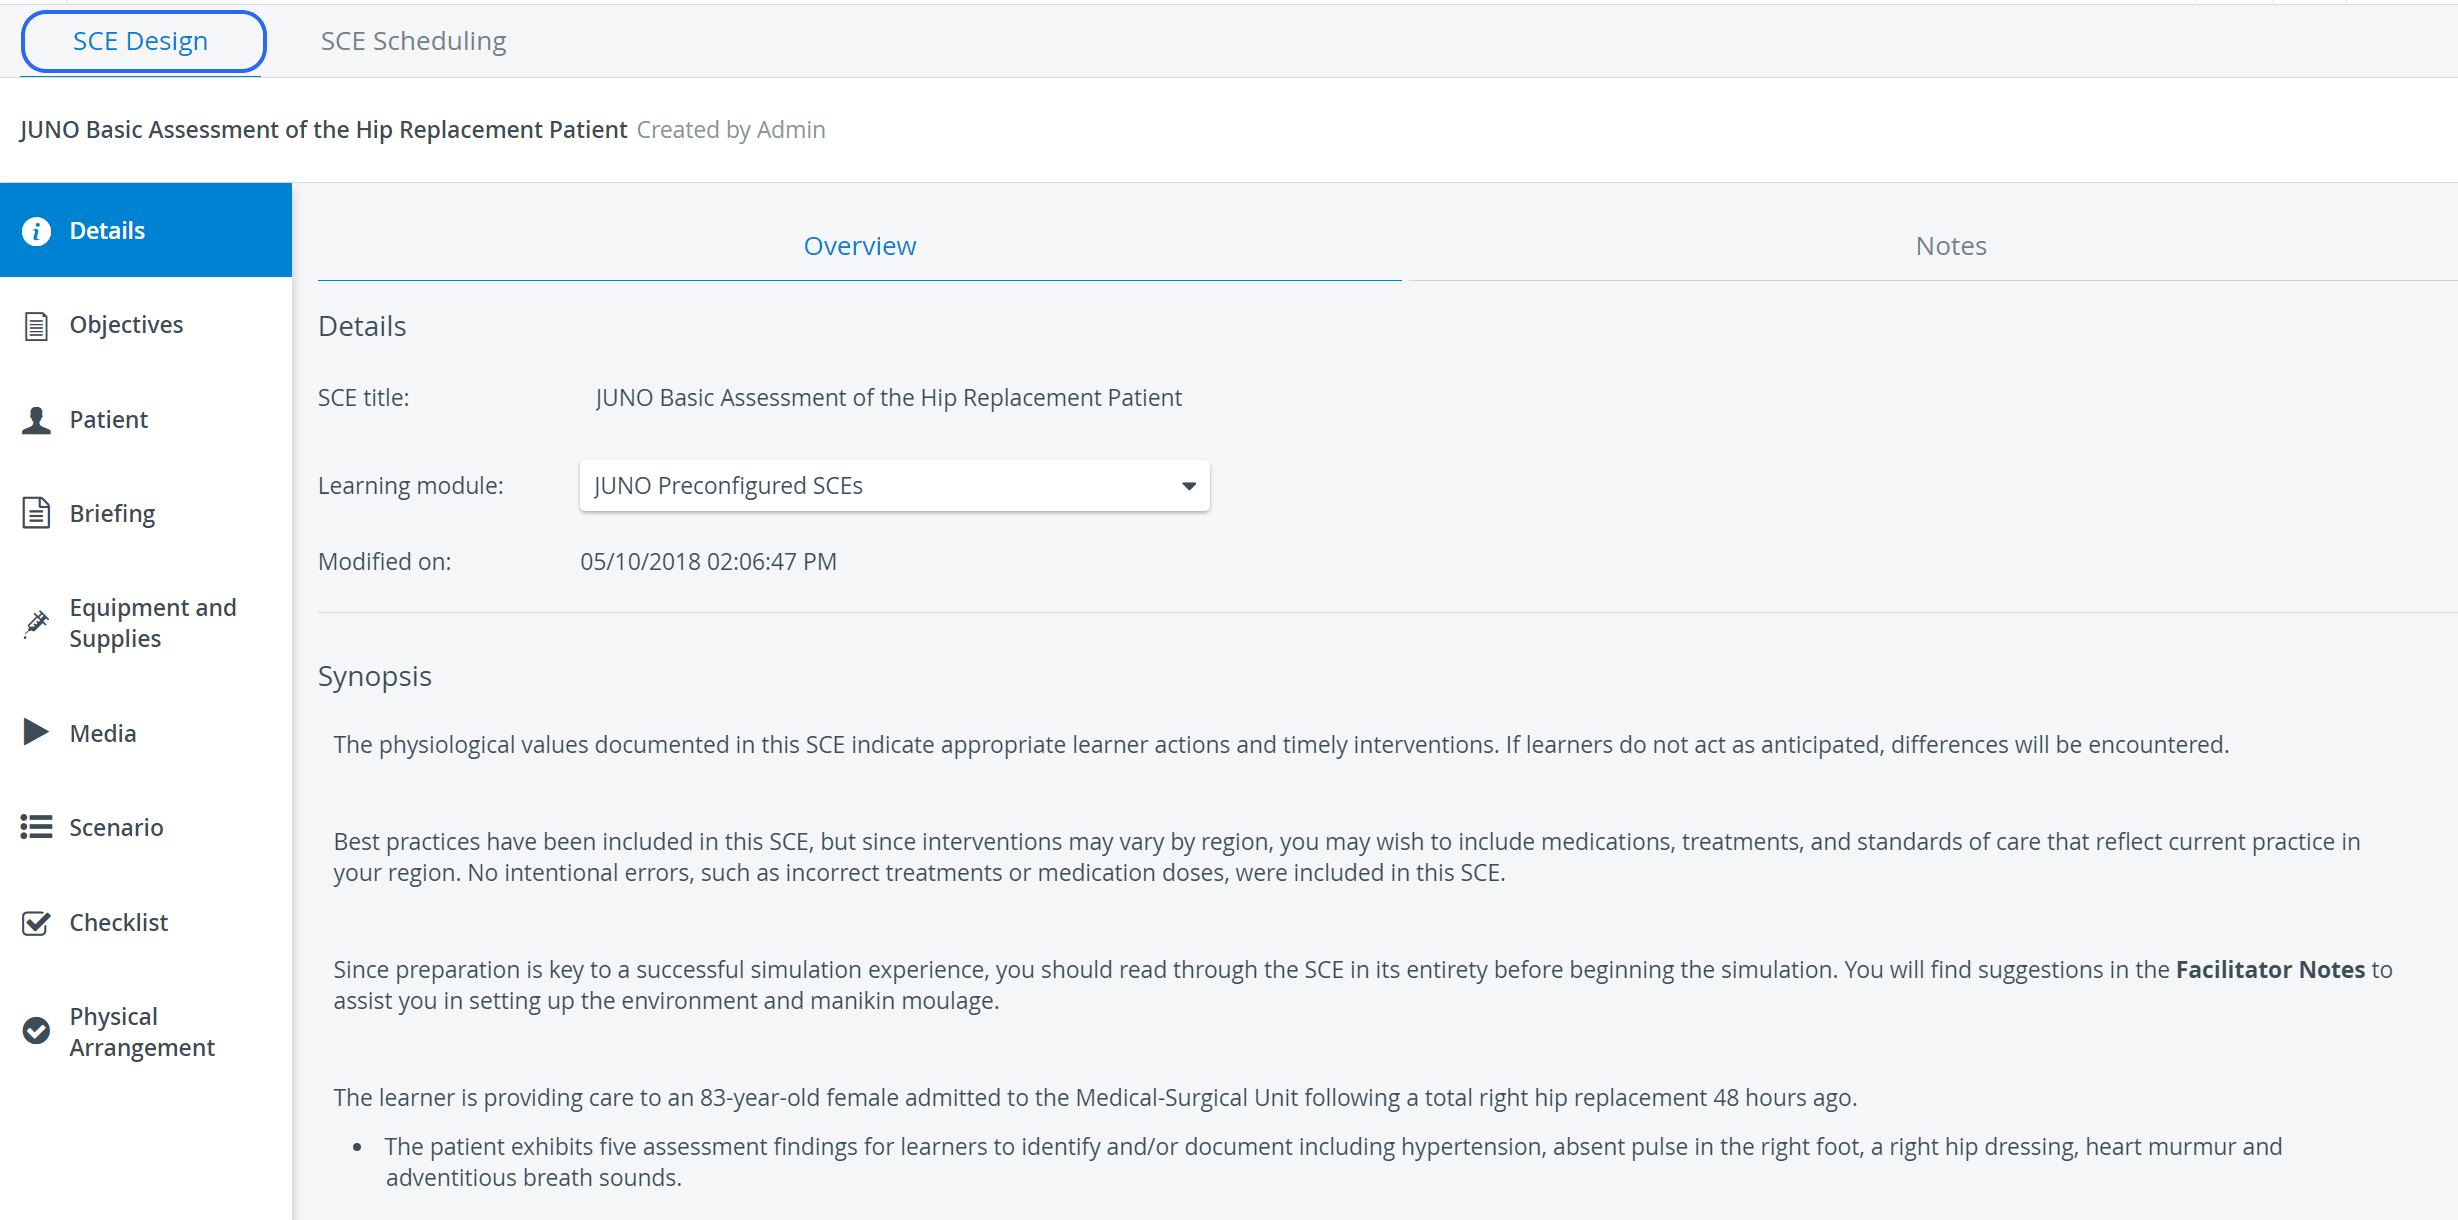
On the SCE Design tab, specify the SCE's targeted knowledge base on the relevant tab of the Objectives part.
Provide basic information and data on the initial status of the patient in the Patient part.
Fill out the relevant tabs of the Briefing part to create a printable/ shareable report to give to the learners beforehand.
Upload files in the Media part to have material ready for display on a designated monitor.
Formulate questionnaires for briefing, performance, or quality evaluation purposes in the Checklist part.
Use the reuse icon to insert items already used in the system.
Give instructions about the Physical Arrangements necessary for completing the simulation.
IMPORTANT: When creating or editing any field of the parts in SCE Design, click the tick icon in the top right corner of the text field to save the modifications.
Plan the structure of the simulation within the SCE Scheduling part.
Emails are activated only when a Subject is provided. Once the email is considered set, the envelope icon will be displayed in blue.
For further information, visit our SCE Management and SCE Management - FAQ pages.