How can I add new/customized Intercom announcements?
The Intercom tab of the System module allows for editing and adding new Intercom announcements. All previously recorded messages are listed and can be listened to by clicking the Play icon in the Controls column.

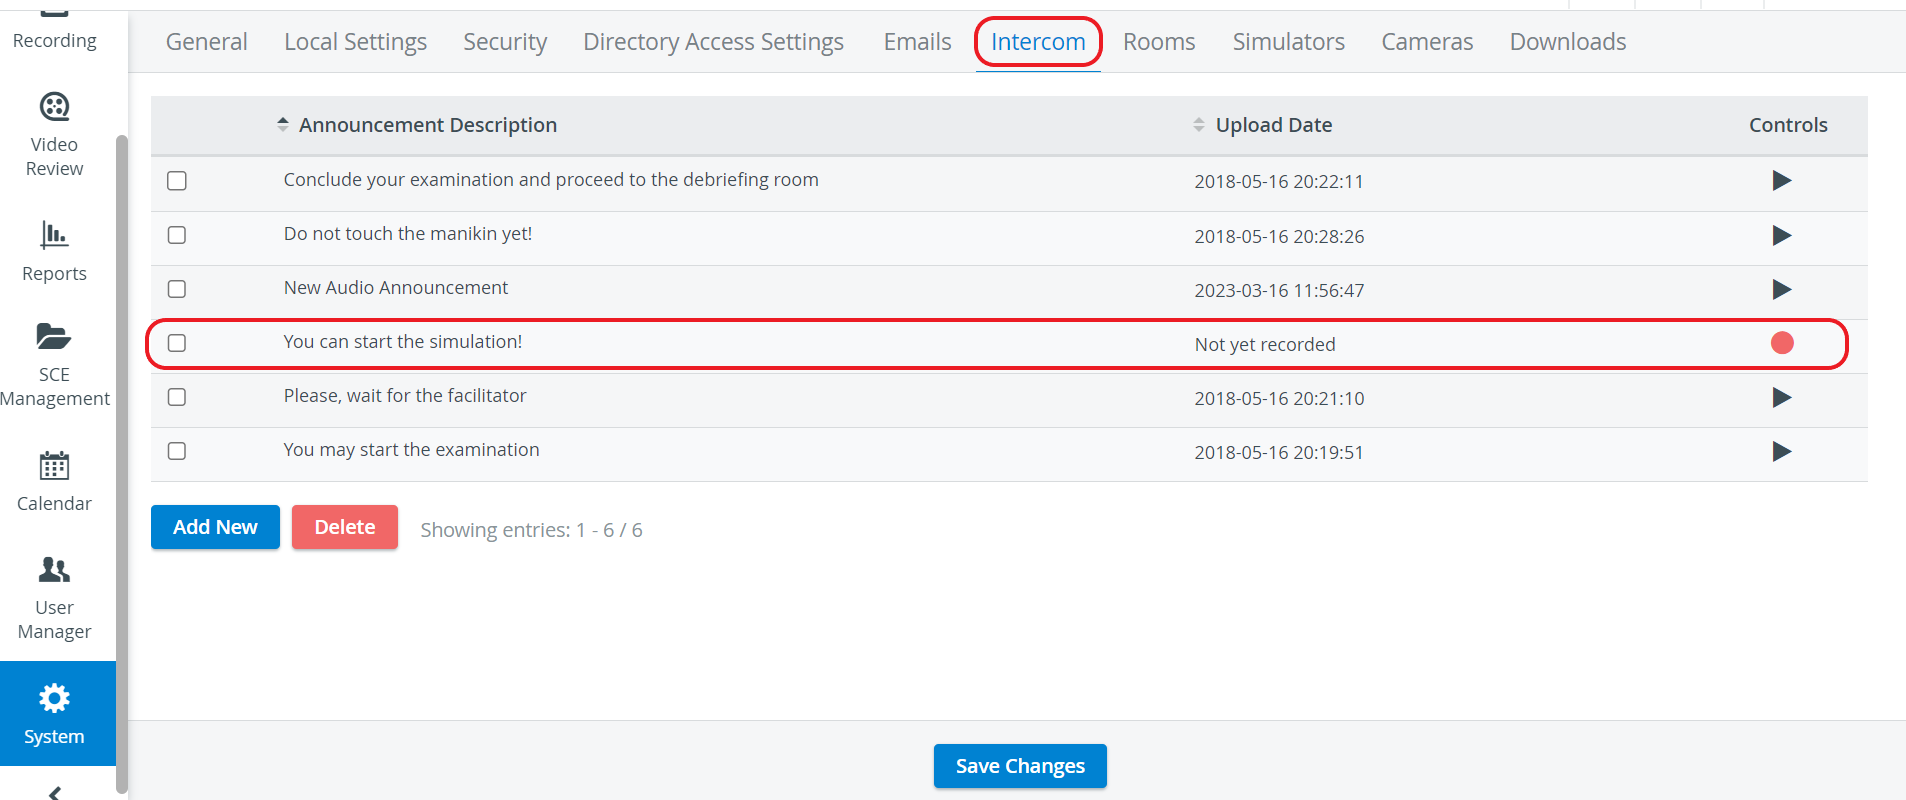
To add a new announcement, click the Add New button.
In the editable New Audio Announcement field that appears, enter the announcement.
- When ready to record, click the REC control next to the new announcement.

- Once the recording is started, the REC control toggles to Stop control.

Say the message you wish to record into the microphone.
When finished, click the Stop button. When the recording is stopped, the Stop control toggles to the Play control.
NOTE: Once an announcement is recorded, the recording date is displayed in the Date of recording column.
To edit a pre-recorded Intercom announcement, click the field to be edited, type in the modification, and then click outside the field. To delete one, check the box of the announcement and click Delete.
During events, live Intercom announcements can be sent to Separate In-room Intercom devices and Separate Facilitator Intercom devices placed within your institution's physical rooms and assigned to the rooms within your LearningSpace system (in the System module, Rooms tab) to instruct the learners or facilitators.
IMPORTANT: The Intercom functionality of LearningSpace requires the web browser to have access to the microphone of the client PC, which in turn requires a secure HTTPS connection to the LearningSpace server.
That is, the client computer's microphone can only be used with a valid SSL certificate. (This restriction stems from the Chrome browser security regulations.)
The Push-to-Talk function of Intercom is not supported on iPads in LearningSpace.
Learn more about the Separate In-Room Intercom device and Separate Facilitator Intercom device.
See also Why are some of the buttons in the Intercom panel inactive?