Speech-to-Text Annotation Tool
LearningSpace Enterprise allows you to conveniently annotate live and saved recordings by taking voice notes using our new speech-to-text tool, available in the Annotations panel in Single Room View (SRV).
The feature transcribes your voice notes in real-time, allowing you to focus on the scenario you are currently viewing.
If your layout is different in your Single Room View, you probably have the Legacy version. For the user guide of Legacy pages, please go here.
The new speech-to-text annotation tool can be used in every language that LearningSpace Enterprise currently supports.
⚠️ The Annotations panel is active only when a recording is in progress.
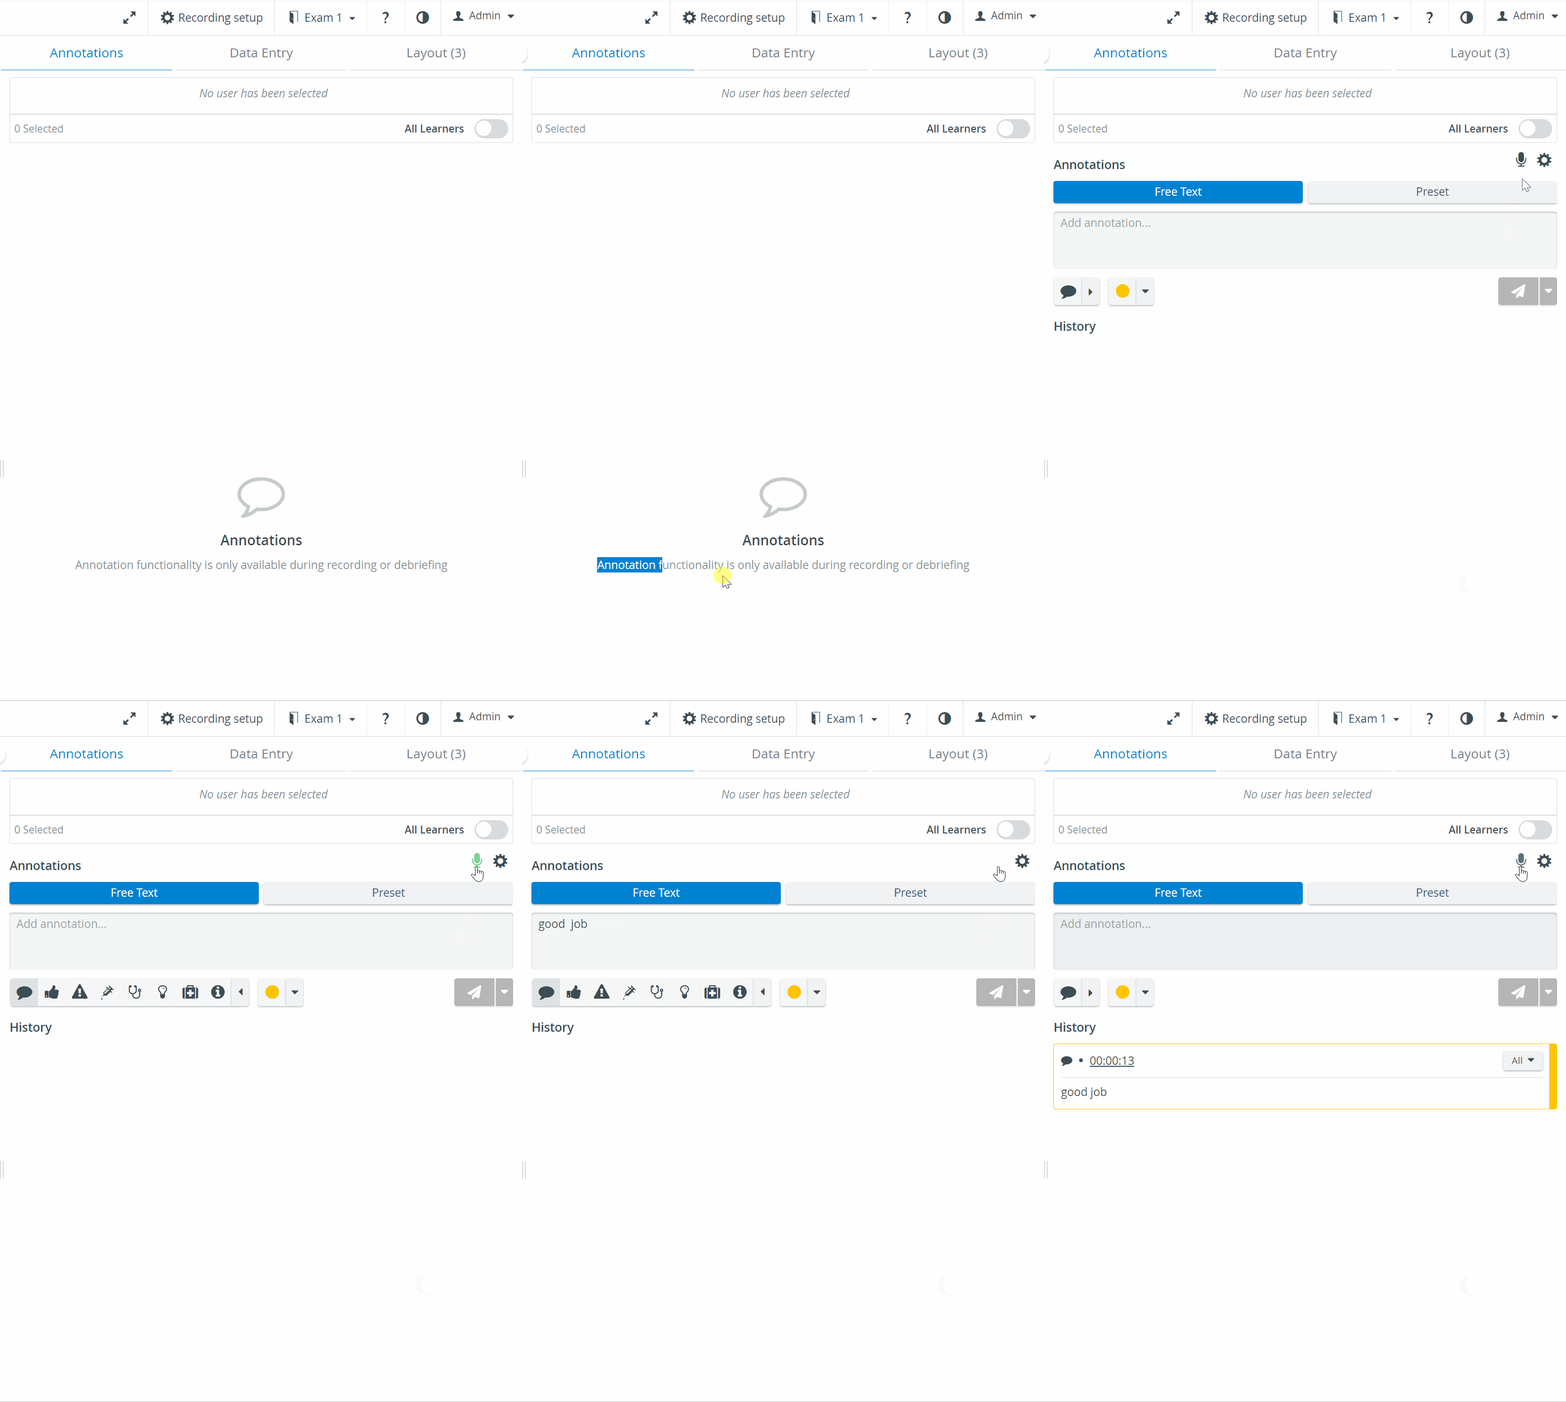
Open the Annotations panel to access your annotation options while you are observing a recording in Single Room View (SRV)—either inside the Recording or the Video Review module.
Click on the blue triangular arrow to open Preset annotations for the speech-to-text controls. You will find that each annotation category is labeled with a number:
The numbers assigned to each category are hotkeys that launch the audio recording.
When you press one of these numbers on your keyboard, the Annotations panel immediately begins recording your voice and associates the annotation with the selected category.
Select a category, then press its number on your keyboard to start voice-recording.
Allow Access to Your Microphone
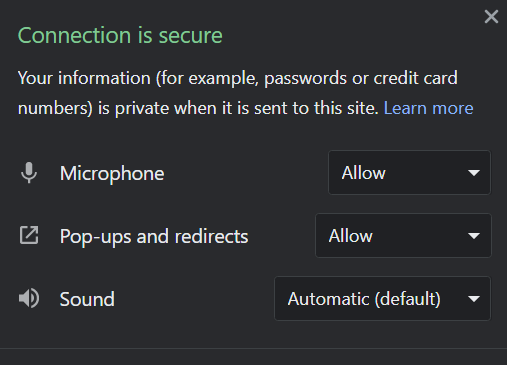
Make sure LearningSpace allows access to your microphone. Click on the padlock symbol in your browser to view your settings:
The green mini microphone icon to the right—next to the cogwheel icon—shows you the status of the voice recording:
The flashing microphone icon means voice recording is in progress:
The idle green icon means that your voice is not being recorded right now, but the speech-to-annotation feature is available:
The grey crossed-over microphone means that speech-to-annotation is not available right now (there is no recording or video playback in progress):
Start speaking into your microphone while holding your hotkey.
Voice recording stops when you release the selected hotkey.
You can see that your speech is being transcribed in the top field of the Annotations panel.
The annotation field auto-grows vertically as you add your voice note.
When you are finished with your voice note, release the hotkey. Your voice annotation is added to the recording automatically upon releasing the hotkey.
Editing Your Voice Note
You can edit your voice annotation before it is automatically added to the recording.
Keep pressing your hotkey while switching to another tab.
While you are at the new tab, let go of the hotkey.
The voice recording will remain in progress while you are at another tab. Release the hotkey.
Switch back to the recording page.
Click in the annotation field to edit your note.
Finally, click on one of the blue speech bubbles to add your annotation to the recording:
Click the blue speech bubble to add an annotated timestamp to the recording.
Click the blue speech bubble with the plus sign to add a timestamped annotation to the recording, then save it as a preset annotation for later.
If you want to supplement your note and resume with a voice recording after you have edited your annotation, the changes you have made to your annotation will disappear.